Harley Shock Adjustment Chart: How to Set Preload by Model
TL;DR
- There’s no single “Harley shock adjustment chart” that covers every model. Preload turns, clicks, and PSI settings are specific to your model and year.
- Your bike uses one of three systems: a threaded spanner-adjusted canister (Sportster, older Dyna, Softail), a hydraulic preload knob plus threaded adjuster (most 2017-and-newer Touring models), or an air shock with a hand pump (some pre-2017 Touring models).
- Your exact chart lives in your owner’s manual or on a wallet card in the back of it, organized by rider weight, passenger weight, and cargo load.
- Always adjust both rear shocks equally, with the bike on the jiffy stand, and set damping to match your new preload.
- If your knob or spanner won’t turn smoothly, stop. A seized adjuster usually needs service, not more force.
Why There’s No Universal Harley Shock Chart
credit: https://www.fixmyhog.com/
Every Harley shock chart is built around a specific model’s spring rate and shock design, so a Sportster table won’t work on a Softail, and a 2015 Street Glide table won’t match a 2024 Road Glide.
Harley-Davidson’s own service documentation breaks preload settings into separate tables by platform: FLSTC/FLSTF/FXST get one table, FXS/FLSTFB/FLSTN/FLSTSB get another, and Touring models split preload across a threaded adjuster and a separate hydraulic knob.
Spring rate, shock travel, and frame geometry differ enough by platform that a turn count correct on one bike could overload the spring on another.
Step 1: Identify Which Shock System Your Harley Has
Look at your rear shocks before you touch anything, since the adjustment method depends on what’s back there.
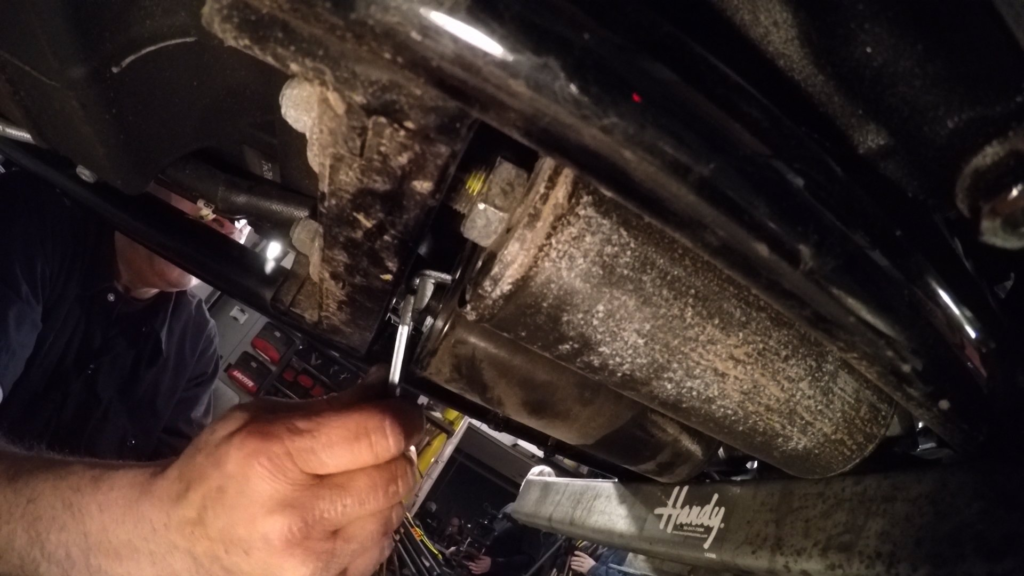
Sportster models and older Dyna and Softail bikes use a threaded spring canister you turn with a spanner wrench, mounted conventionally or, on Softails, inverted under the bike.
Most 2017-and-newer Touring models split the job in two: a threaded adjuster on the right shock sets your baseline for rider and passenger weight, and a hydraulic knob under the left saddlebag fine-tunes preload for cargo without tools.
Some pre-2017 Touring bikes use air-adjustable shocks instead, set with a hand pump rather than a spanner or knob.
If you’re not sure which one you’ve got, pull up your saddlebag or look under the bike near the swingarm mounts. The tool you’ll need tells you the system.
Step 2: Find Your Model’s Actual Preload Numbers
Your real chart is in your owner’s manual, not a generic online table. Harley prints preload tables by model and, on Touring bikes, includes a wallet card in the back of the manual for quick reference.
If you’ve lost the manual, a Harley dealer’s service information system has the exact table for your VIN.
Weigh yourself, your passenger, and your loaded saddlebags or Tour-Pak separately. The chart adds turns or clicks for each category, so guessing the total defeats the point of a calibrated setting.
Step 3: Make the Adjustment
Get the bike on the jiffy stand before you start; adjusting with weight on the suspension gives a false reading.
On threaded canister shocks, loosen the jam nut, use the spanner in the canister’s holes to turn it clockwise until it stops (that’s zero preload), mark that position, then turn counterclockwise the number of turns your chart specifies before retightening the jam nut.
On Touring models with the hydraulic knob, turn it counterclockwise until it stops for minimum preload, then clockwise the number of half-turn clicks your chart lists for your load.
Adjust both shocks the same amount. An uneven setting side to side makes the bike pull or wallow in corners, which is not something you want to discover mid-lean.
Don’t Skip the Damping Adjustment
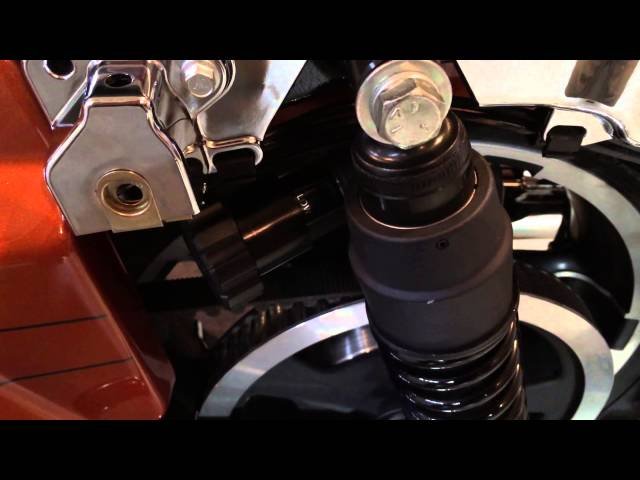
Preload sets ride height and how much the spring resists your weight, but damping controls how fast the shock compresses and rebounds, and Harley’s tables treat the two as a pair.
Heavier total loads call for more compression and rebound damping; lighter loads call for less, set to match whatever preload table you just used.
Skipping this step is like putting stiffer springs on a car and leaving the shocks alone. The ride gets bouncy even though the preload number is technically correct.
Harley Shock Adjustment Systems at a Glance
| System | Common Models | Adjustment Tool | What It Sets |
|---|---|---|---|
| Threaded spanner canister | Sportster, older Dyna, Softail | Shock spanner wrench | Preload only |
| Threaded adjuster + hydraulic knob | Most 2017+ Touring | Spanner (right side) + hand knob (left side) | Preload for rider/passenger and cargo separately |
| Air-adjustable shock | Some pre-2017 Touring | Hand air pump | Preload via air pressure (PSI) |
Turn counts, click counts, and PSI figures are model- and year-specific. Check your owner’s manual or a dealer for your bike’s exact numbers.
Frequently Asked Questions
Where do I find the actual Harley shock preload chart for my bike?
In your owner’s manual, organized by model, often with a wallet card in the back for Touring bikes. No manual? A Harley dealer can pull the exact table for your VIN.
Can I use a preload chart from a different Harley model?
No. Spring rate and shock design vary by platform, so a turn count correct on one model can overload the spring on another. Stick to the table for your exact model and year.
How do I know if I need more preload?
If the bike sags noticeably with a passenger and luggage, or feels harsh over bumps unloaded, your preload doesn’t match your typical load. Weigh your usual rider, passenger, and cargo total and check it against your chart.
Do I need a special tool to adjust Harley shocks?
Threaded canister shocks need a shock spanner wrench sized to fit the canister’s holes. Hydraulic knobs on newer Touring models turn by hand. Air shocks need a low-pressure hand pump, never a gas station air hose.
What happens if I adjust both shocks unevenly?
The bike handles asymmetrically, pulling or feeling unstable through corners since each side resists your weight differently. Always set both shocks to the same turn count, click count, or PSI.